In this step-by-step tutorial I’m going to show you how to do some cool Mickey Mouse themed nails. We’ve done them in Minnie Mouse colours (pink and white, with a bit of rainbow glitter) for an extra girly touch, but you can use any colour combo you like.

Lumos Base and Top Coat
Start out by applying a base coat. This step is so important that I dedicated a whole blog post to it! I recommend Lumos by Famous Names because it reduces the drying time – bonus!
 Need some tips on how to paint your nails like a professional? I’ve got you covered!

PRO TIP: If you don’t have a dotting tool, just use the blunt end of a brush!


Finish off with a top coat to seal and protect your nails. If you’ve used Lumos base and top coats, your nails should be fully dry in 15-30 minutes. If you’re using any other kind of top and base coat, then I recommend waiting at least an hour to ensure your manicure is fully dry.
Thanks to Rachael from Made From Scratch and Penny from Monaco Nails & Beauty for helping me bring this tutorial to you. You should go and check out their websites while you’re waiting for your nails to dry!
So, how are your nails looking? I hope you found this Mickey Mouse nail tutorial helpful!
xo Meagan
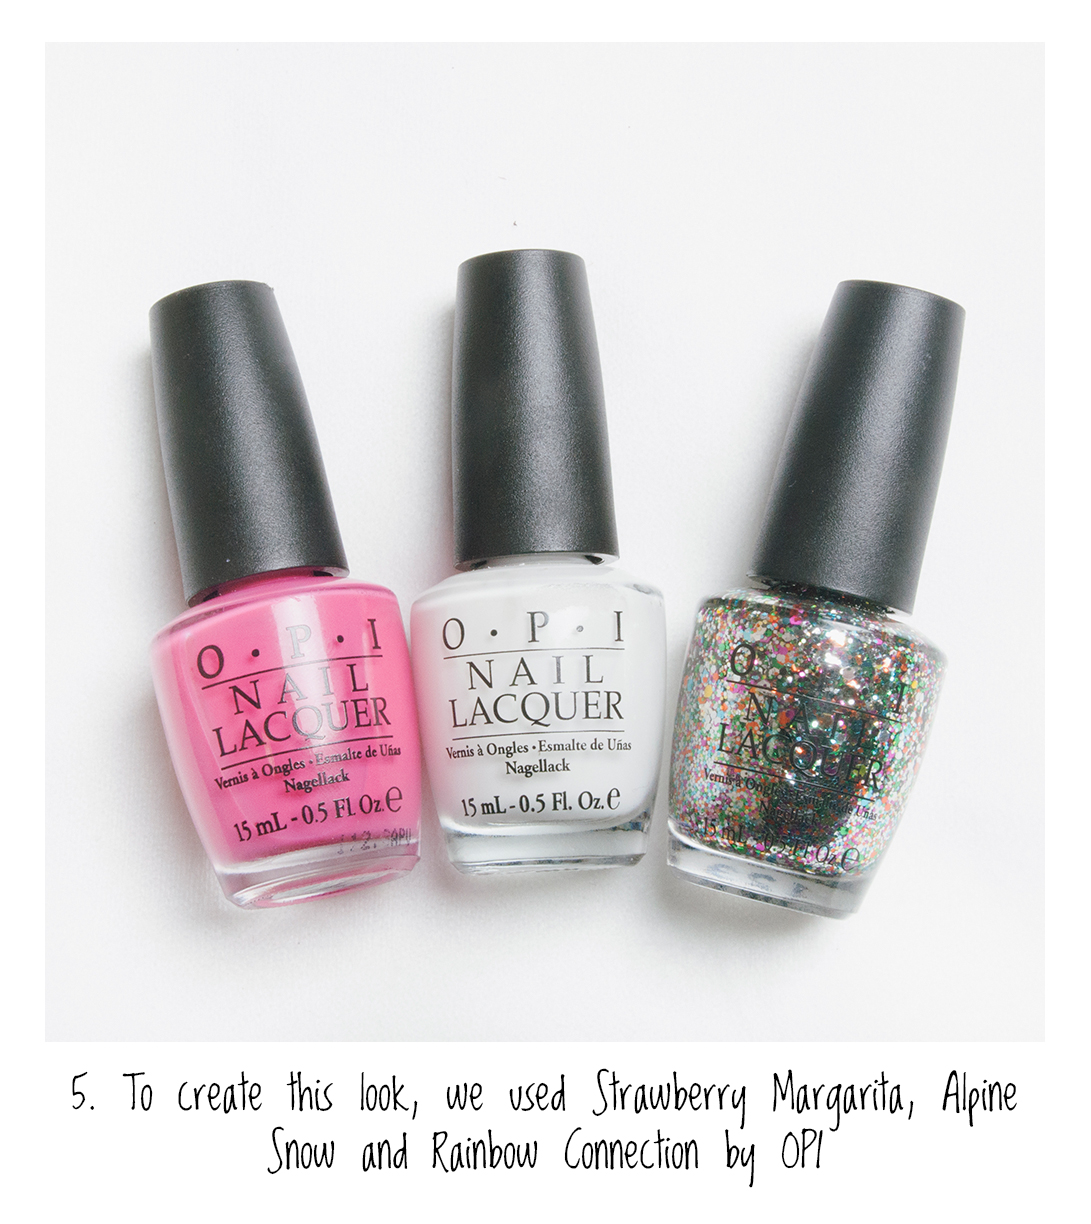
Products used:
OPI Strawberry Margarita
OPI Alpine Snow
OPI Rainbow Connection
Lumos Base Coat
Lumos Top Coat

Aww I wanna do my nails like this wish I had a base coat and top coat. Love it its so cute.